The sniper/spotter relationship is pure symbiosis, each working together to achieve a common goal – putting rounds on target. The skills and techniques employed in this partnership are not limited to the battlefield; they translate directly to hunting. Most action films would have you believe that the sniper operates alone, and while one must be capable of performing solo it is rarely the case in reality. It is a team operation and each member has a role to play.
The more experienced sniper is usually the spotter, because that’s the more difficult task, involving processing and accurately relaying all the information on the target, such as precise location, distance, speed, windspeed and hold to be applied. The spotter also has to coach the shot, see the strike, apply correction for the next shot and find the next target.
How often have you hunted with someone who helped you spot the animal, get set up and make a successful shot? It happens all the time. If you are hunting with someone, then you are both already on the same page; a level of trust and cooperation exists even if you’ve just met. That instinct to help and contribute to a successful hunt is probably so deeply ingrained in our DNA that we can’t do anything other than help, or at least try to help. Sometimes, however, be aware that if you lack the techniques, that ‘help’ can just add confusion.
 Let’s start with target indication. The way to think of this is like giving directions: start at a known point and talk them on from there. A good example of this might be:
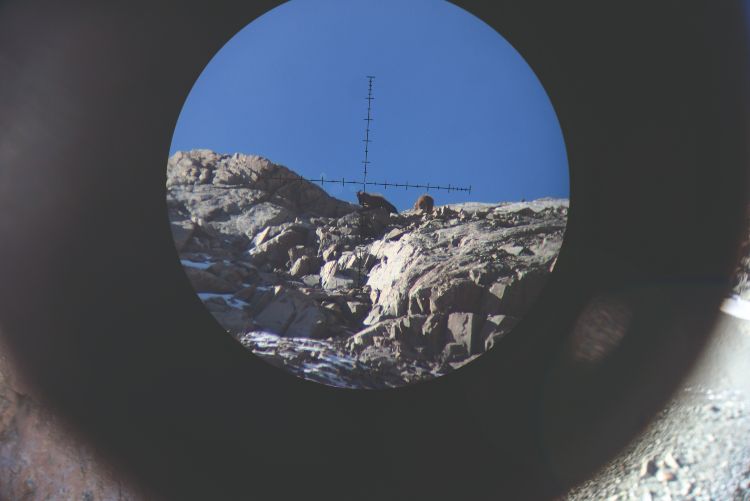
Spotter: Reference the large tree stump, directly to our front, 150m, looks a bit like a minion.
Shooter: Seen… that knob on the top right looks like a big eye?
Spotter: Yes. Come 2 o’clock of that stump until you see the stream.
Shooter: Seen … looks like a little waterfall, 500m?
Spotter: (After using his rangefinder to confirm distance.) Yes. Directly behind the stream there is a square patch of rushes.
Shooter: Seen… with a large rock in the centre of the rushes?
Spotter: Yes. Go 3 o’clock of that rock and you’ll see a bedded stag in the rushes.
Shooter: Seen, 615m.
What we have here is the clock-ray method of indication, plus some nice descriptions of features as well as confirming those features with another description. This ensures there is no mistake.
A poor example might look like this;
Spotter: Look, a bedded stag!
Shooter: Where?
Spotter: Up there in the rushes, lying down, head to the left. He’s hard to see, can’t believe I spotted him from here. I’m so good at spotting deer!
Shooter: Which rushes?
Spotter: Up there across the river. Use your binos.
Shooter looks out across the mountain, sees two streams coming down, each lined with patches of rushes along the entirety of their banks. He shakes his head in despair and wishes his friend had read this article.
At best, a poor target reference means the hunter doesn’t see the target; at worst the wrong animal is shot, or an unsafe shot is taken. Target indication is without doubt an important skill that improves with practice.
Once the deer is spotted it’s time for the stalk. More communication is required here. As a guide it is my job to be the spotter, ensure we find the right animal, perform a good stalk, and ensure the hunter is ready and well set to make a successful shot.
My usual instructions are “Do as I do, stay close, move when I move, and do not load until we are in position and I tell you to do so.” When leading the stalk I am focused on the target deer but also on the watch for any animals that may foil our plan. Sometimes the plan will change on the fly, and that’s OK. The wind can change, the route you chose may not be viable or a target of opportunity may appear.
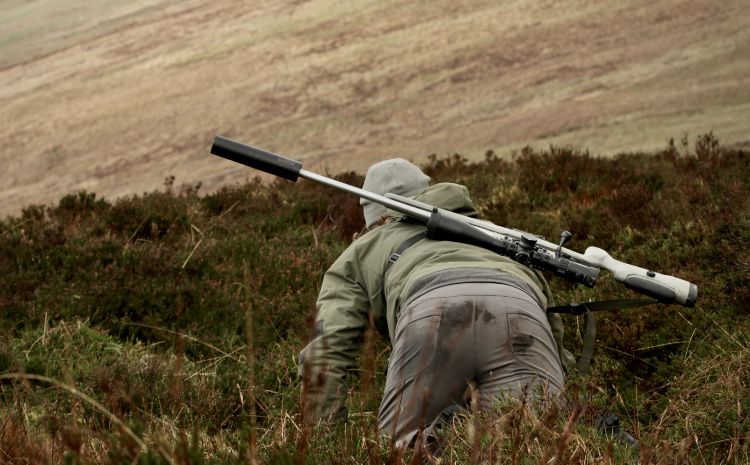
It is important to remain flexible and adapt to the situation as it unfolds. You can go quickly at the beginning of a stalk, but the closer you get to the target the more you need to trade speed for stealth. I often see speed foil a stalk at the last moment, usually in deploying support systems or placing the rifle. The rule of thumb is that the closer you are the more cautious you need to be.
The other thing to remember is to use the ground to your advantage – there is no need to crawl if you have cover that facilitates walking without being seen. Noise is another factor to be aware of as you cut the distance to the deer. In extremely close circumstances the slightest brush of fabric, pop of a lens cap or deployment of a bipod can alert the deer. I have a few tricks that I employ to reduce noise. The first is being careful, the second is testing your kit before the hunt to ensure there are no rattles or squeaks from loose straps or buckles. I always stow my straps in full OCD mode and sometimes I even cover items likely to create noise, like the frame of your pack banging against your scope. For communication during the stalk I rely on hand signals and body language for the most part, but sometimes a “Psst” is required to get the hunter’s attention. Stay close and you won’t have an issue.
Selecting a suitable firing position can be a demanding task. A keen eye and a little luck help, but being inventive about building a shooting position and using available supports will deliver success from most situations. If you remain undetected then you will have the freedom to pick and choose your firing position. If the deer cop you, then it limits your time and options.
Before a hunt even commences, I will have done some preparation for the shot. I will have discussed a number of factors with the hunter – calibre, ammunition, zeroed range, comfortable shooting distance, etc. My goal is always to get to 100m or less, but I believe that 200m is achievable for all hunters. I also favour shots from the prone position if possible, with the deer broadside for the shot. But again, it is all situation dependant.
Once I have located a good shooting position it is time to build a solid rest/position. For this I will use all that is available to me, terrain features, man-made objects, my pack, bipod, sticks, tripod, rolled up jacket, sling, binos… whatever makes it work. The spotter does all he can to ensure a successful shot. In the hunting situation this can mean placing the quadsticks, adding supports like your pack or bumbag as a rear rest, ensuring muzzle clearance, coaching a silent loading of the rifle, coaching breathing and relaxation to lower the heartrate (sounds like a spa treatment session). Then it’s ensuring we are sighted on the correct animal. This requires a similar talk-onto-target as above. As the guide/spotter, it’s my responsibility to range the animal, make a wind call and ensure the shot is safe.
When I am guiding I will always look to optimise the opportunity and ensure the animal is broadside to us for the shot. When required I will calmly support with reassurances, such as wait until you are perfectly still; breathe; gentle on the trigger; see the strike; we have lots of opportunity; take your time; only shoot when its perfect. I will also use my experience and judgement to tell them to shoot, or to stop if I see the situation is about to change. This can be a sharp “Stop, do not shoot” or a calm “OK, perfect time to shoot now.”
I never rush the shooter, even if I am screaming inside. A guide who applies pressure or rushes the shooter will pay the price with poor shots, long tracking jobs and wounded deer. At times it can be frustrating, especially when you’ve put in some crazy work to make a perfect opportunity, but that’s all part of hunting. It is important to have good communication between the spotter and the shooter before, during and after the shot. An ideal pre-shot routine might sound like this:
Spotter: On glass. 5 o’clock, 202m, stag, broken antler, feeding, facing right, quartering away, large rock to his rear. Range 202m, wind left to right 5mph, full value, hold 0.2mil left.
Shooter: On stag with broken antler, quartering away.
Spotter: Check your turrets. Stag is moving. Broadside now. 205m. Hold left 0.2. Fire.
The shooter then places a perfect shot, sees the stag go down, smiles and back clapping ensues.
 Once the spotter has supported the shot with distance, wind call, target presentation and safety, it is then time to follow up and recover. Again, this starts with observation – seeing the strike and the animal’s reaction. In an ideal situation you see the animal die, mark the spot and walk straight up to it. In the real world that doesn’t always happen, so you need to be accurate about marking where you fired from, where the animal was when it was struck, what its reaction was and where you last saw it.
Trailing the animal requires reading the ground for signs and then reading those signs – what type of blood, bone or hair, and what other marks or signs are present. Once the animal is reached there’s more work – dispatch if required, take in the moment, relive the stalk, maximise the experience, admire the beast, take some photos, then gralloch and prepare for the haul out. But the work doesn’t end there. There are years of unseen work, experience and preparation in every guide – medical training, navigation and problem solving are just a few.
Being a spotter and being a guide have many similarities, both demand skills, attention to detail and hard work. A good guide will be an ambassador for hunting and will work their guts out to ensure the deer are treated with respect and good management, and that the hunter has a positive experience that they will cherish for their lifetime. As the saying goes, it’s a dirty job, but somebody’s got to do it.